Here's what I did. I can't believe it was this easy! Thankfully I have a penchant for saving plastic containers, just in case. I don't have a lot as we don't purchase much in plastic but I found just what I needed.

I used a 1 kg honey container (you could use cottage cheese or sour cream as well) two lids off large peanut butter containers, a plastic mayo jar, exacto knife and glue gun with non-toxic glue.
First the feeder
Using the knife cut holes around the honey container as shown below. They don't have to be exact and slightly larger might be a bit better as they seem to have to work a bit to get the feed out.

Using the glue gun, place glue around the bottom of the container.
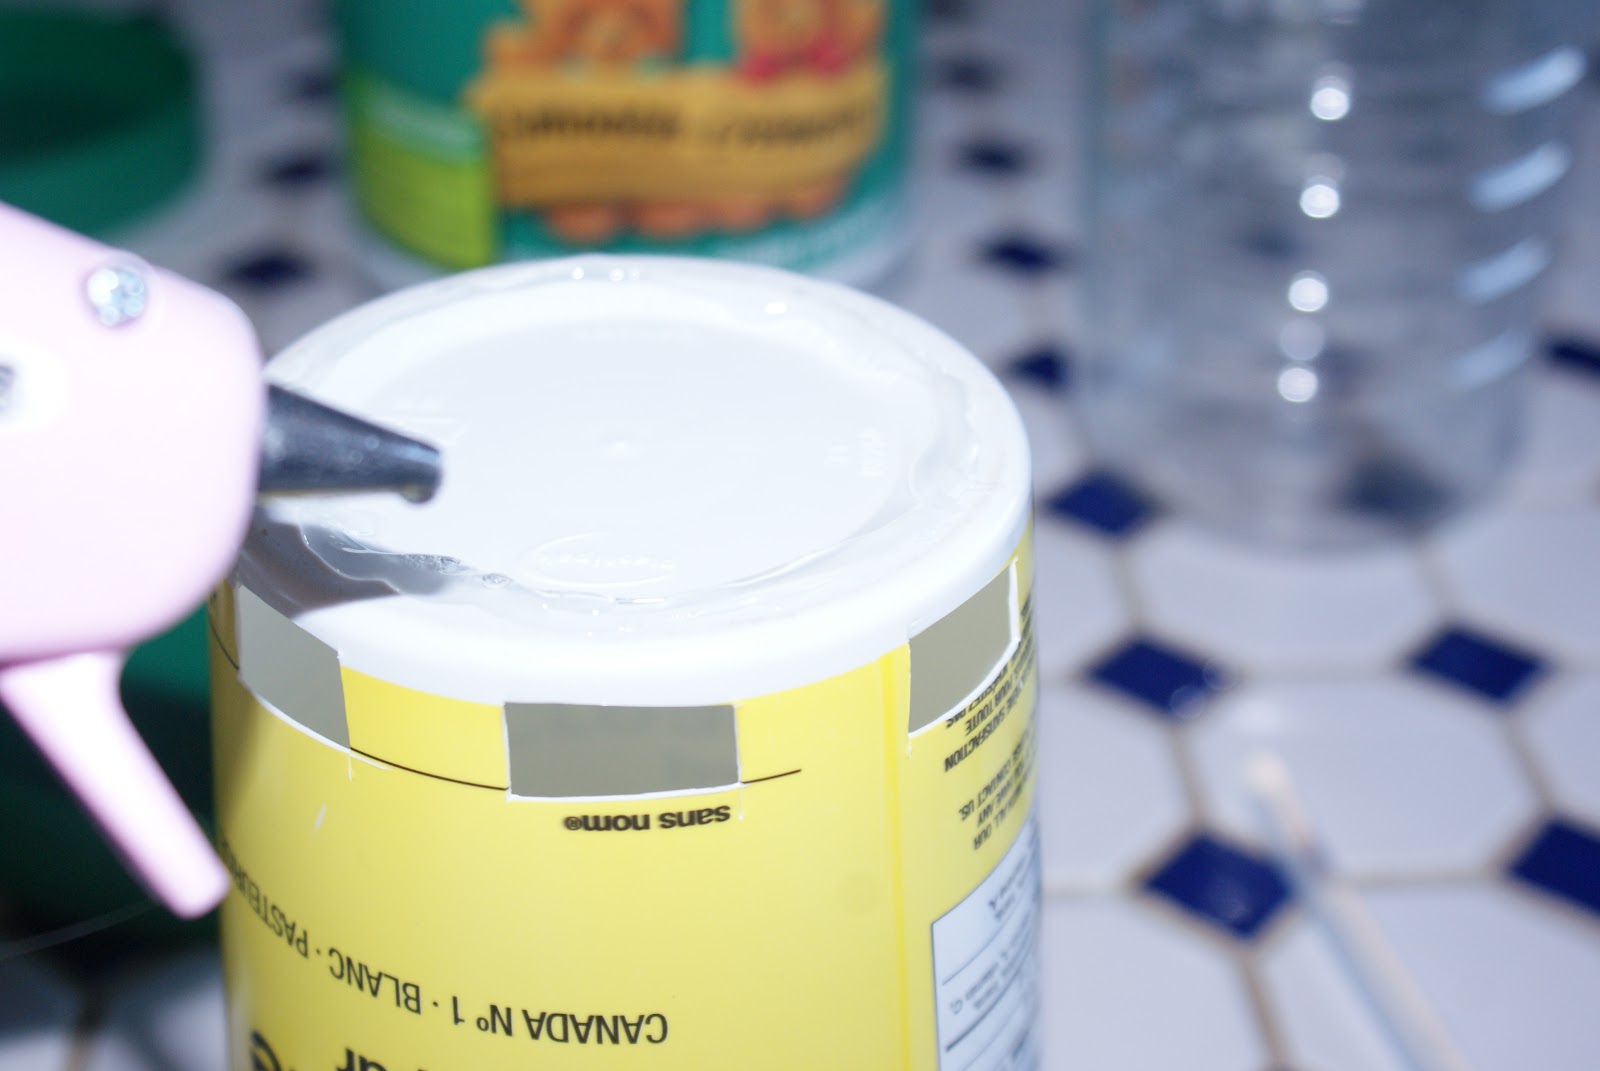
Center in the middle of the peanut butter lid, press down and allow to dry before filling.

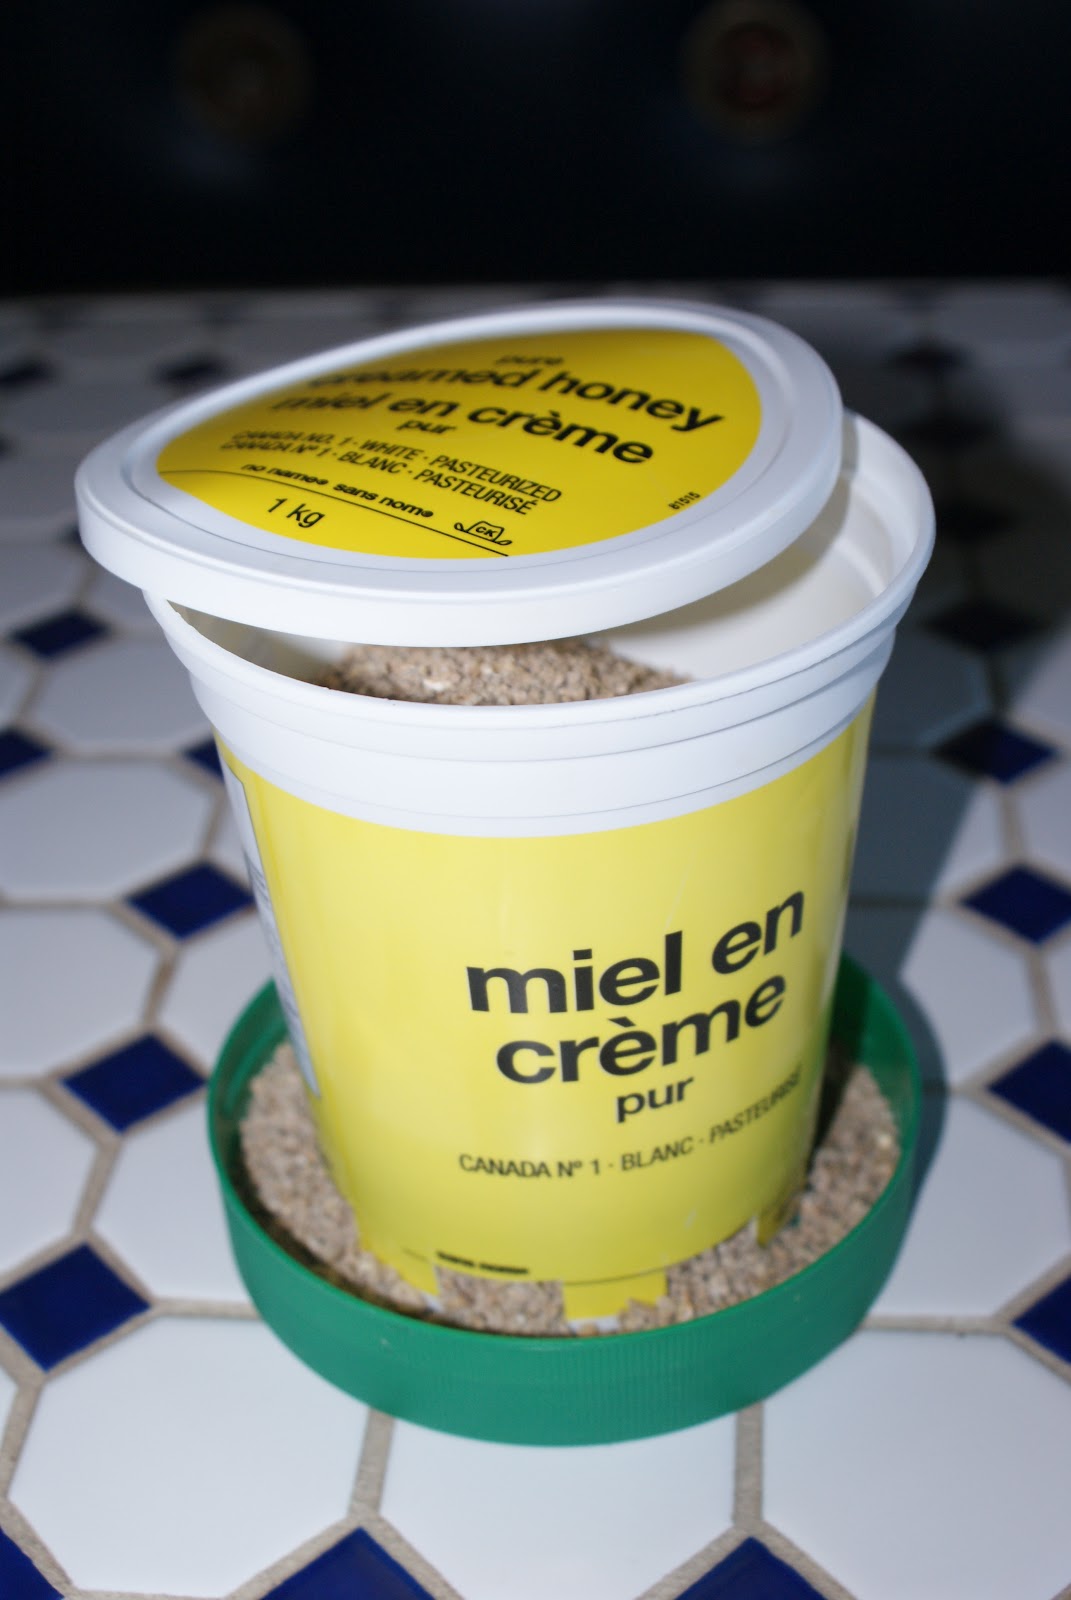
I actually like this one much better than the one we purchased as it can be filled from the top.
Now for the watering system

For this you will use the mayo container and the other peanut butter lid. Make sure you take the wrapper off the container or they will pick at and eat it.

Make about 3 small holes like this at the bottom of the sides of the container. They don't need to be very big. Then glue to the peanut butter lid exactly like the feeder and let dry.

All done! At first I thought I made a mistake as the water just flowed right out and I was getting a bit frustrated until I realized the water wouldn't overflow if I closed the lid! LOL! So, be warned! It will leak like crazy until you close the lid and then it will work fine.
Cost to make? A few cents for the glue. That is a whole lot cheaper than the $6 each from the stores in town!
Also linked in at Mind Body and Soulhttp://mindbodyandsoleonline.com/herbal-information/43rd-wildcrafting-wednesday/, Frugally Sustainable and Sugar Bee Craft blog hops.
Glo, Now that's smart thinking girlfriend :-)
ReplyDeleteThe birds have no idea things are different. As long as they get their food and water their fine.
Great ideas! I'm sure the chicks love it and the extra space too!
ReplyDeleteGreat ideas for being self sufficient, recycling and clever!
ReplyDeleteWonderful & cost effective idea. I plan to make a set of these for my new chicks this coming spring. How well has the waterer & feeder held up thus far? In regards to the water container, did it remain glued & intact to the lid despite being surrounded by water? After using these, is there anything you would consider modifying or changing?
ReplyDeletealternatively you could glue the mayo lid, upside down, into the PB lid, and your 3 small holes as close as possible to the neck of the mayo jar (or just create slots in the threads of the mayo jar). Then fill the mayo jar with water, screw the lid assembly on and turn the whole thing upside down. No leaking!
ReplyDeleteI would like to make the water bottle for birds can I use a larger base lid? I can hardly believe this will work
ReplyDeleteYes you can. I just used what I had on hand.
ReplyDeleteSo cool. Binn using rely small bowl that they keep nocking over. Have no monny for real feaders and stuff right now. I have all theas suplise at home thank you.
ReplyDeleteNice trick! I didn't try it yet, but with a simple overview, I agree that it will work. To fill the waterer easily, just use a pipe and fill the container from the holes on its bottom and enjoy!
ReplyDeleteI will also make this! I just hatched one chick and this will be perfect for it.
ReplyDeleteNice Blog Thank you for Sharing information. For Chick Feeder & Grower Feeder Equipment's in India visit Vijay Raj Poultry .
ReplyDeleteI tried it...it worked! Thank you :)
ReplyDeleteNice Blog Thank you for sharing information about poultry products. To Buy Grower Feeders and Chick Feeders for Poultry Farm in India visit Vijay Raj Poultry Equipments Pvt Ltd.
ReplyDeleteThank you for sharing information about poultry products in your blog. To Buy Poultry Grower Feeders in India visit Vijay Raj Poultry Equipments Pvt Ltd.
ReplyDeleteThese are great!!! Thanks so much Glo!
ReplyDeletejust what I needed. thank you!
ReplyDeleteThank you!
ReplyDeleteThanks so much for the idea! I’m having an issue though, if I close the lid, the water doesn’t come out of the holes. If I open it slightly, water overflows from the bottom! Not really sure if anyone else ran into this issue? If tried on a peanut butter jar and a mini Gatorade bottle and neither are working ☹️
ReplyDeleteYes, I had the same experience, made 3 small holes, put on lid, but it still overflowed:(
Deletemake sure the holes are lower then the height of the lid on the bottom then it shouldnt leak :)
DeleteThis is great idea i will try this.thank you
ReplyDeleteI just did this for my quail chicks! It works amazing. They are so tiny so I used a peanut butter jar and glued it to a very shallow lid so they could reach it. Got them expensive waterers but they won’t use them lol
ReplyDeleteThank you for this! I just made 3 feeders for my chicks and they are quickly figuring them out! I hope to try a waterer next!
ReplyDelete